
shotframe
A CLI that turns raw simulator captures into App Store screenshots. A device frame, a heading and a line of copy, at exactly the size the store wants.
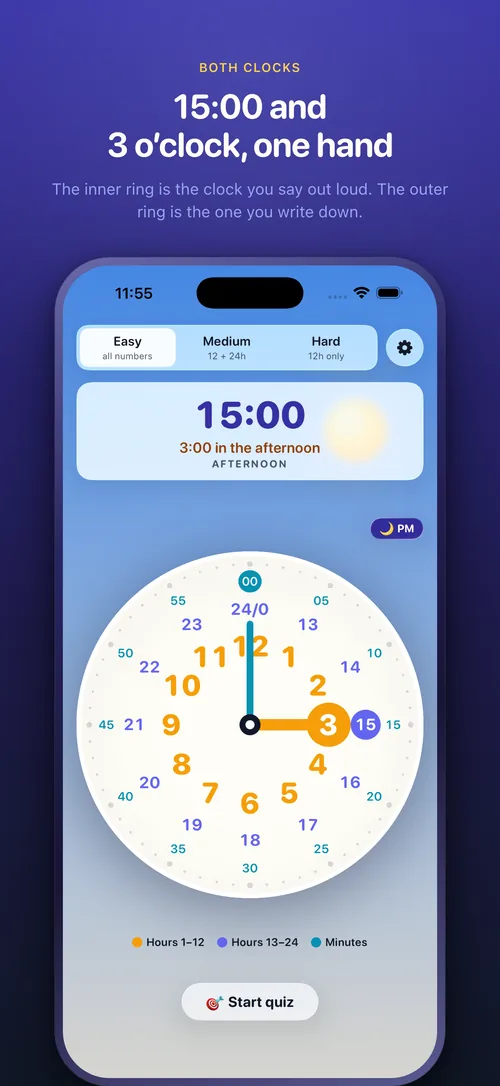
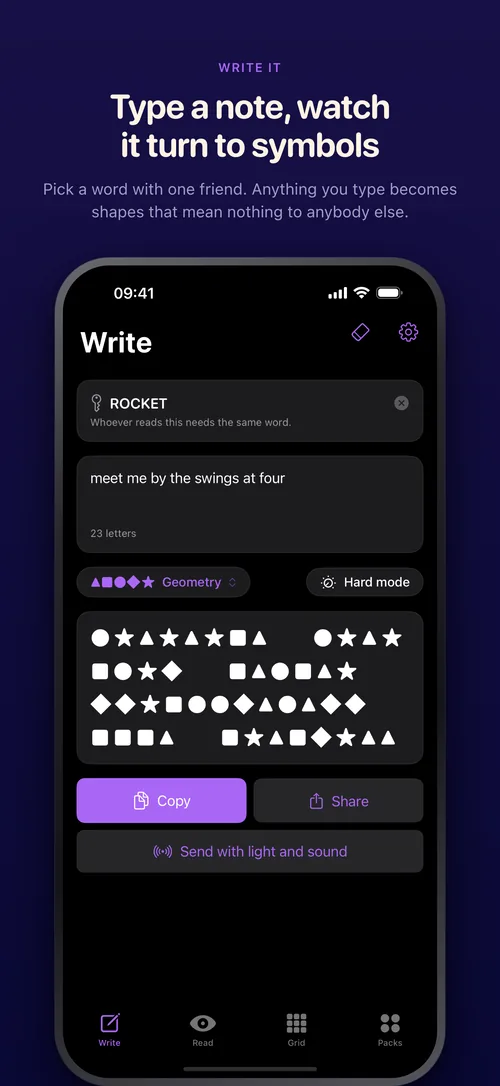
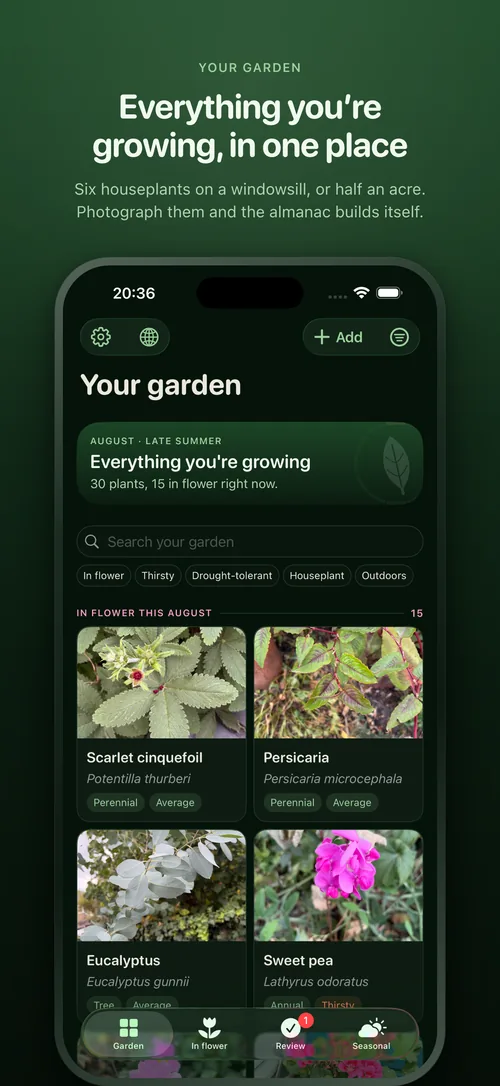
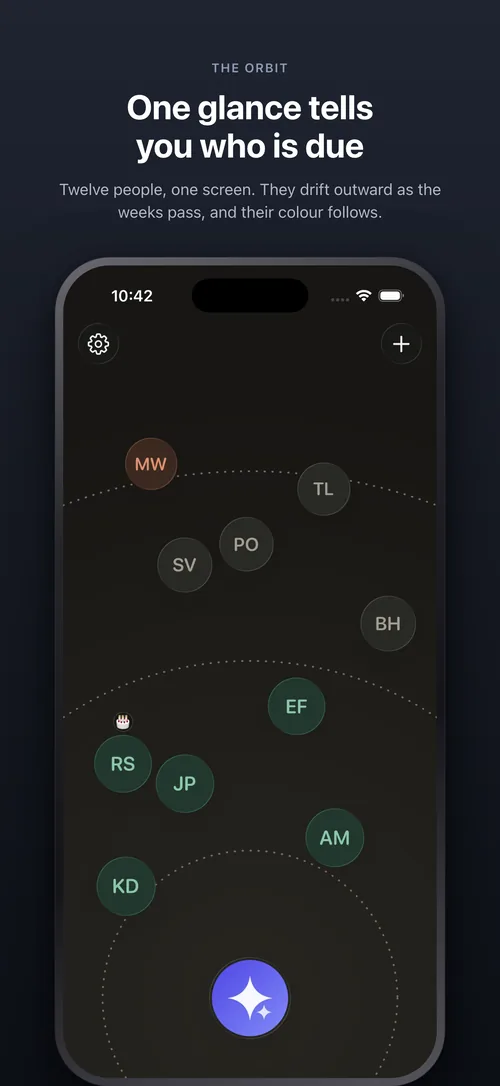
I built this to standardise the App Store screenshots for my iPhone apps. Shoot the screens in the simulator, drop the PNGs in a sources/ folder, name them in a config with the copy you want above each, and run shotframe. Out comes the set in fastlane/screenshots/, ready for deliver.
- Renders each panel from a small HTML page with headless Chrome, at the device’s scale factor
- Your capture is placed at its natural size and never resampled
- Heading and body get a fixed two lines, so the phone sits at the same height in every panel
- Copy that needs a third line fails the build instead of pushing the phone out of frame
- Background gradient taken from your app’s own palette
- One JSON config with a
$schema, so you get completion in your editor. It’s plain enough that Claude can update and manage it for you - No dependencies. It uses whatever Chromium you already have
pnpm add -D @mrmartineau/shotframe
shotframe init   # a config, and a sources/ folder to shoot into
shotframe        # build the set
Project README
shotframe
App Store screenshots from raw simulator captures: a device frame, a heading and a line of copy, rendered at exactly the size the store asks for.
You shoot the screens in the simulator. shotframe puts each one in a bezel
under some words, on a background taken from your app's own palette, and writes
the set to fastlane/screenshots/ ready to upload.
| Moons | Code Buddy | Green Claws |
|---|---|---|
 |
 |
 |
shotframe init      # a config, and a sources/ folder to shoot into
shotframe           # build the set
No dependencies. It renders with whatever Chromium you already have.
How it works, and why it's built this way
The frame is a small HTML page — a flexbox column, a gradient, an <img> — and
headless Chrome takes the picture. The page is authored in CSS points and
rendered at the device's scale factor, so iphone-6.9 is laid out at 440×956
and comes out at 1320×2868, which is what App Store Connect wants. Your
capture is placed at its natural size and never resampled: the pixels the
simulator produced are the pixels that ship.
Two things it will stop you doing:
- Copy that doesn't fit. Each panel measures its heading and body before it is photographed. A third line doesn't wrap harmlessly — it pushes the phone down and out of the frame, and the damage is easy to miss at thumbnail size. So it fails the build instead.
- A set that jumps. Heading and body each get two lines of space whether they use them or not, so the phone sits at the same height in every panel. Without that, a short heading lifts the device and the set visibly jumps as someone swipes through it in the store.
Install
pnpm add -D @mrmartineau/shotframe
Then add it to your scripts:
{ "scripts": { "screenshots": "shotframe" } }
Or don't install it at all: pnpm dlx @mrmartineau/shotframe.
Installing it locally is worth it for one reason — shotframe init will then
point the config's $schema at the installed copy, and your editor will give
you completion and hover docs for every option below.
Quickstart
shotframe init- Shoot your screens on the right simulator and drop the PNGs in
sources/. Shoot the whole set in one appearance: a light capture among five dark ones reads as a mistake rather than a choice. - Name them in
panels, with the copy you want above each. shotframe
While you're working on one panel's wording, shotframe --only watering
rebuilds just that one.
Copy that overflows exits non-zero, so wiring shotframe into CI will catch a
listing edit that no longer fits before it reaches App Store Connect.
Config
shotframe.config.jsonc, or shotframe.config.json if you prefer — both are
found automatically, and comments and trailing commas work either way. .jsonc
is the default init writes, because it is the extension editors and linters
already read as JSON-with-comments: a commented .json file needs a line of
config in biome or prettier before it stops being an error.
Only panels is required; everything else has a default.
{
  "$schema": "./node_modules/@mrmartineau/shotframe/schema.json",

  "device": "iphone-6.9",
  "sources": "sources",
  "out": "fastlane/screenshots/en-GB",

  "theme": {
    "background": "linear-gradient(180deg, #1d4527 0%, #0b1c10 100%)",
    "fonts": {
      "display": "\"SF Pro Rounded\", -apple-system, sans-serif",
      "text": "\"SF Pro Text\", -apple-system, sans-serif"
    },
    "colors": {
      "eyebrow": "#9cd19d",
      "heading": "#f0faef",
      "body": "#c2e6c2"
    }
  },

  "panels": [
    {
      "slug": "01-garden",
      "source": "garden.png",
      "eyebrow": "Your garden",
      "heading": "Everything you’re growing, in one place",
      "body": "Six houseplants on a windowsill, or half an acre."
    }
  ]
}
Every path is resolved against the config file's own folder, not your working
directory, so shotframe -c apps/ios/shotframe.config.jsonc from the repo root
does the same thing as running it from apps/ios.
device
| Preset | Pixels | |
|---|---|---|
iphone-6.9 |
1320 × 2868 | the size App Store Connect requires for iPhone |
iphone-6.7 |
1290 × 2796 | |
iphone-6.5 |
1242 × 2688 | |
iphone-5.5 |
1242 × 2208 | |
ipad-13 |
2064 × 2752 | |
ipad-12.9 |
2048 × 2732 | |
android-phone |
1080 × 1920 | Google Play's minimum phone size |
Or give it the numbers directly:
"device": { "width": 440, "height": 956, "scale": 3 }
width × scale and height × scale both have to be whole numbers — shotframe
checks, because half a pixel is a rejected upload.
theme
The half that should come from wherever your app's own colours live. A listing that invents its own palette stops looking like the app it is selling, so pull these from your design tokens and change them together.
background takes any CSS background value, so a stack of gradients is fine.
fonts.display is the heading; fonts.text is the eyebrow and body.
Fonts have to be installed on the machine doing the rendering — there is no
network in the page. If you need a webfont, put an @font-face with a data:
URI in css (below) and name it in fonts.
panels
In upload order. Order matters twice over: the store shows the first few in
search results, and fastlane deliver uploads in filename order — which is why
slugs are usually numbered.
| Key | ||
|---|---|---|
slug |
required | output filename, without the extension |
source |
required | the raw capture, a file inside sources |
heading |
required | keep it under about 40 characters |
eyebrow |
optional | small caps line above the heading |
body |
optional | keep it under about 110 characters |
eyebrow and body are optional, but give every panel one or none — a set
that mixes them sits the phone at a different height in each, which is the
jumping problem again. shotframe warns if you do.
The rest
bezel is the device frame — pad, radius, screenRadius, background,
shadow. These are page points describing how the bezel looks at the size it
actually renders, not a scale drawing of a real handset.
type is the type scale: size, leading, weight, tracking for
eyebrow, heading and body, plus uppercase on the eyebrow and opacity
on the body.
layout is paddingTop, paddingX, gap (between the three lines of copy),
stageGap (between the copy and the phone) and reservedLines.
css is appended after everything else, for the one thing the config didn't
foresee.
chromePath points at a Chromium if the usual places are wrong. The
SHOTFRAME_CHROME environment variable does the same thing.
With fastlane
Point out at the locale folder deliver expects:
"out": "fastlane/screenshots/en-GB"
Then fastlane deliver picks the set up in filename order. For more than one
locale, run shotframe once per config — one file per language, each with its
own out and its own translated copy.
Programmatic use
import { loadConfig, runBuild } from '@mrmartineau/shotframe'

const config = loadConfig('shotframe.config.jsonc')
const { written, overflows } = runBuild(config)
With a coding agent
The package ships an agent skill at skills/shotframe/SKILL.md, covering the
config, the copy limits, and what each error means. Link it into whichever
harness you use:
# Claude Code, for one project
mkdir -p .claude/skills
ln -sfn ../../node_modules/@mrmartineau/shotframe/skills/shotframe .claude/skills/shotframe

# Claude Code, everywhere
ln -sfn "$PWD/node_modules/@mrmartineau/shotframe/skills/shotframe" ~/.claude/skills/shotframe

# Codex
ln -sfn "$PWD/node_modules/@mrmartineau/shotframe/skills/shotframe" ~/.codex/skills/shotframe
Copy the folder instead of linking if you would rather it survive a
node_modules wipe.
Licence
MIT